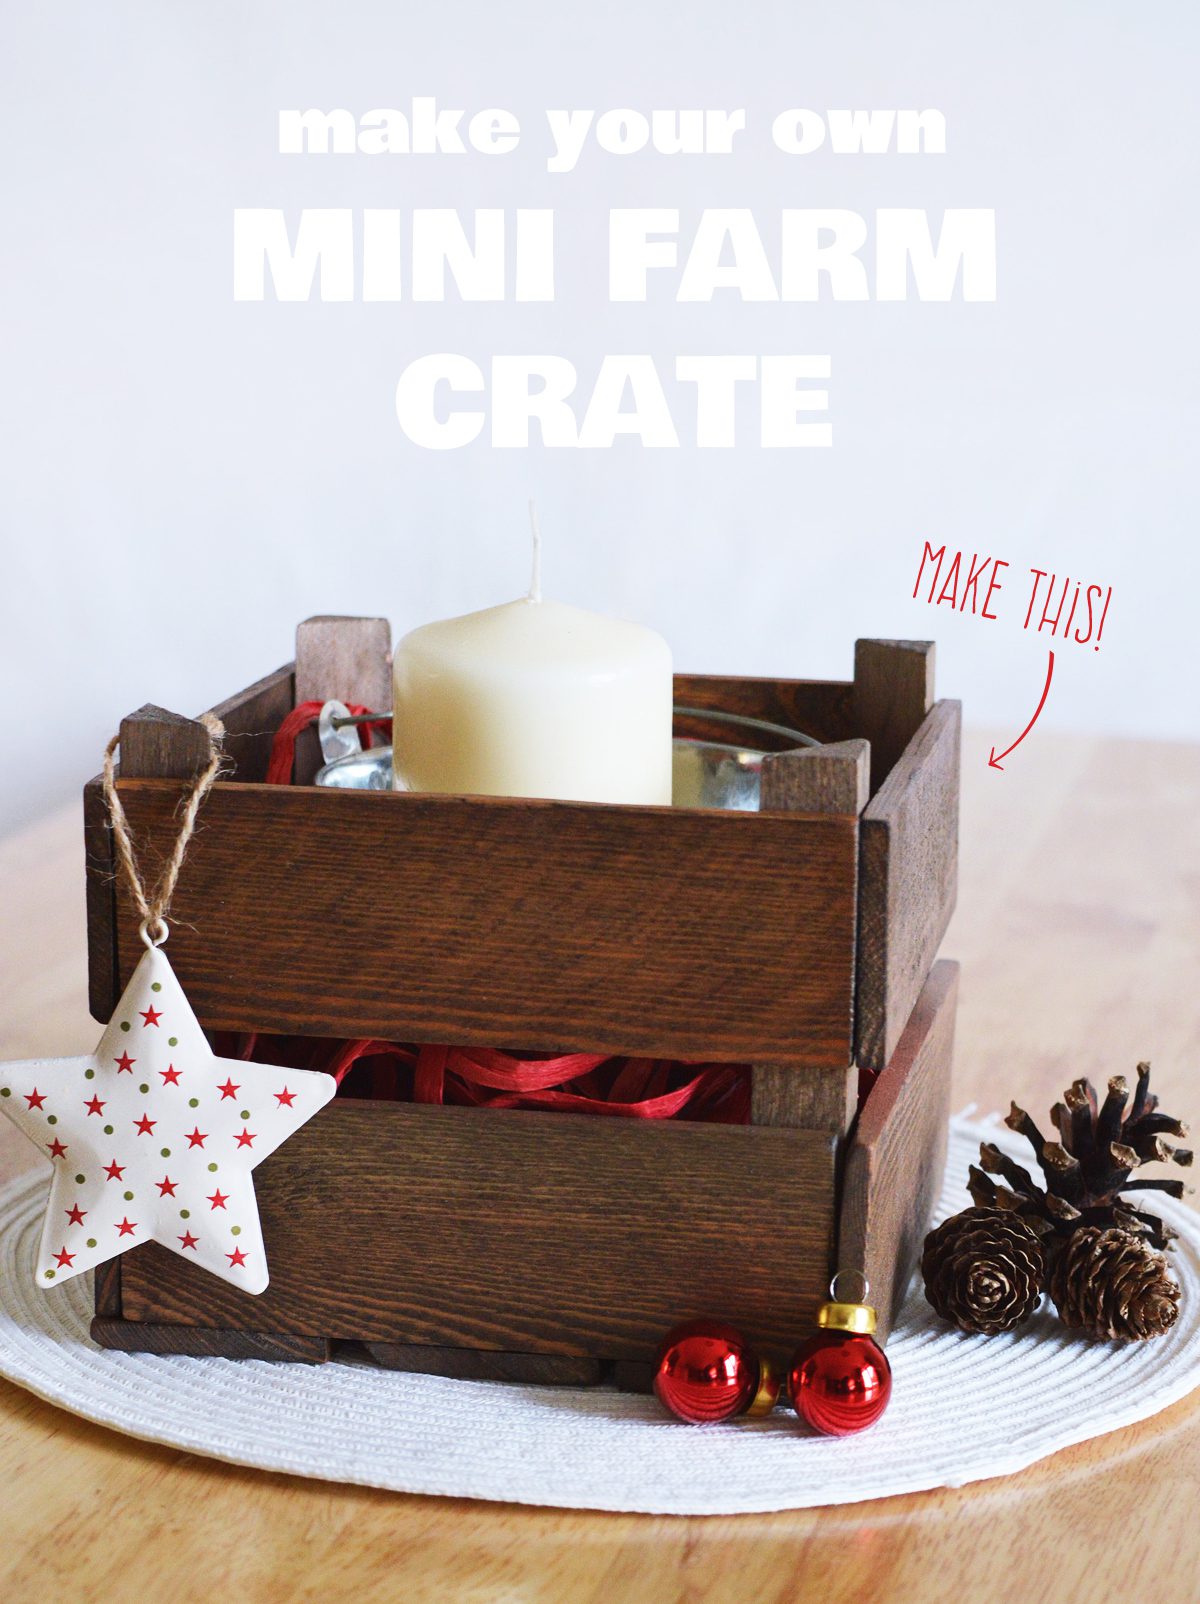
DIY Mini Farm Crate
This Christmas it’s just Alex and me round the table for dinner.
To make it cosy I wanted to make a rustic centrepiece for a warm, country feel. A farm crate would have been perfect. Problem is, it would be a bit big for a table for two. Crafting time!
If you have old wicker baskets or pale wooden crates, you can use the same dyeing and sanding technique to get an aged look fast.
What you’ll need
The tools:
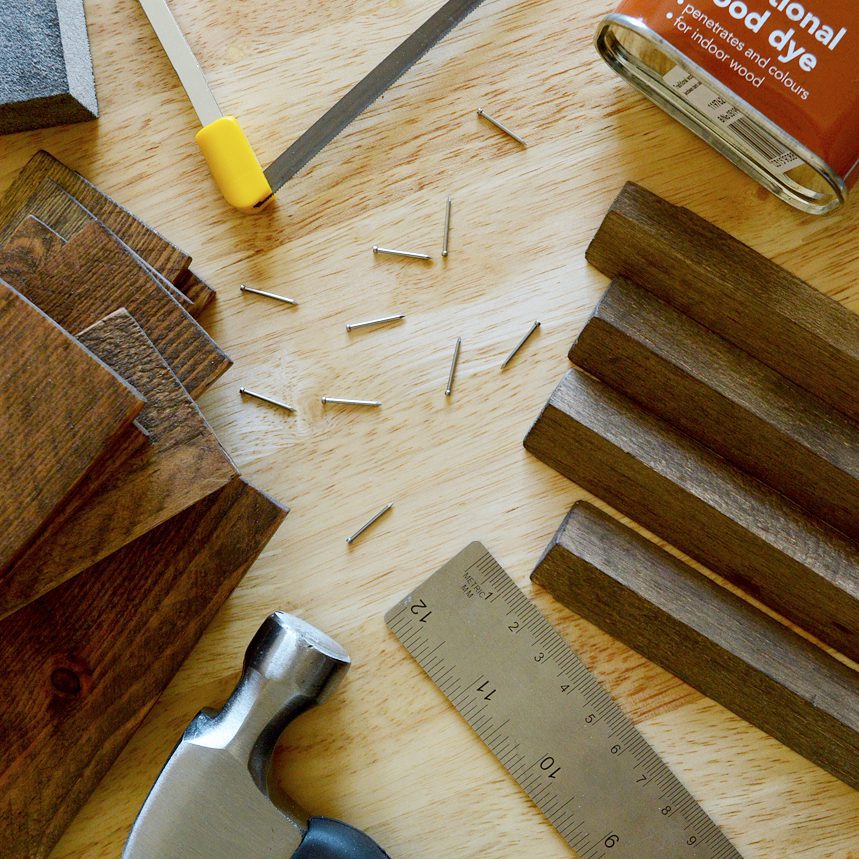
- Hobby saw and fine sanding block
- Wood dye in dark oak or similar dark brown-grey colour
- Hammer and nails
OR PVA glue and glue brush (I used the glue!) - A ruler and pencil
The wood:
Time to get to your local hobby shop! I bought triangular balsa wood for the supports and 5mm thick, 4.75cm wide panels for the sides. You’re looking for panels with knots and a textured surface. Balsa panels would be too smooth to get the farm crate look. You need to saw your wood into:
- 7x 15cm lengths for the sides and bottom
- 4x 14cm lengths for the sides
- 4x 12cm tall supports from the balsa wood – height depends on the width of your panels
Most hobby shops sell by the metre. I bought 3 metres for the side panels (you need minimum 2x 1m lengths) and 1 metre for the supports.
Ageing the Wood
Use the ruler and pencil to mark the lengths you need. When sawing, don’t worry if the panel splinters at the ends. You’ll be sanding it later and it just adds age!
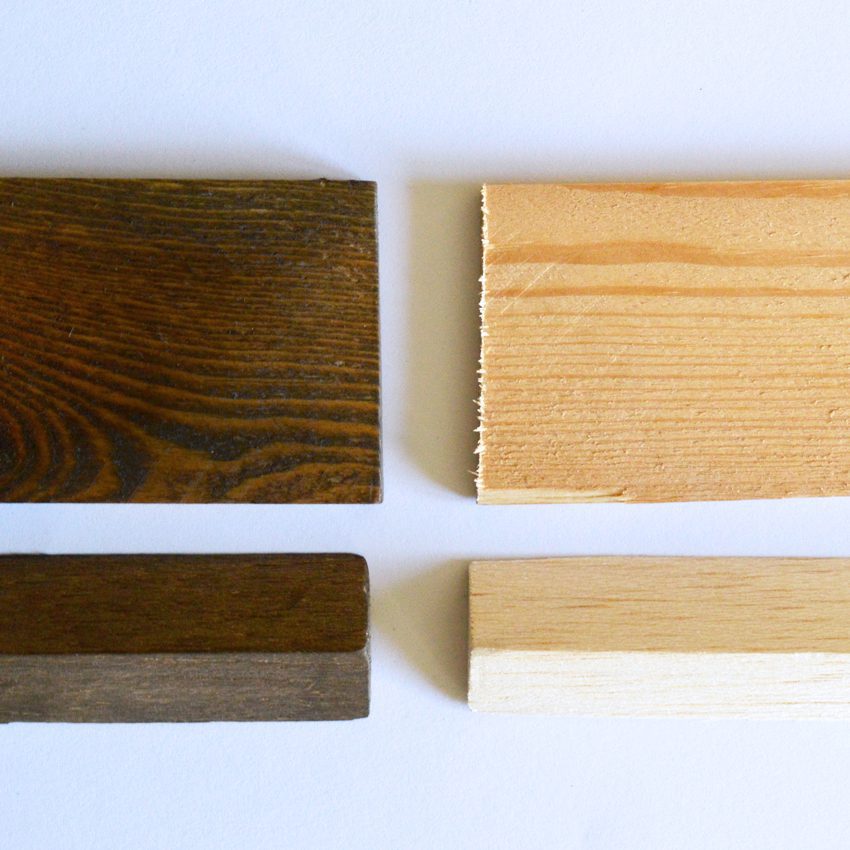 Above: the difference dyeing makes
Once the pieces are ready, it’s time to age them. Subtly round the edges of the panels, but don’t sand the sides smooth. The texture will pick up more dye and add to the weathered look.
Follow the directions of your dye! (Except for the ‘sand until smooth’ part.) If you use a wood dye like I did, you need to rub it in with a lint free cloth (I used an old, clean sheet!) in a well-ventilated area. I let my dyed panels sit overnight so they were completely dry.
[box title=”An alternative to wood dye” box_color=”#835037″ title_color=”#ffffff” radius=”2″]There’s an alternative to using wood dye. You need to prepare this wood stain in advance but it’s 100% natural and safe. Learn how to make a wood stain using vinegar and steel wool. [/box]Piecing it together
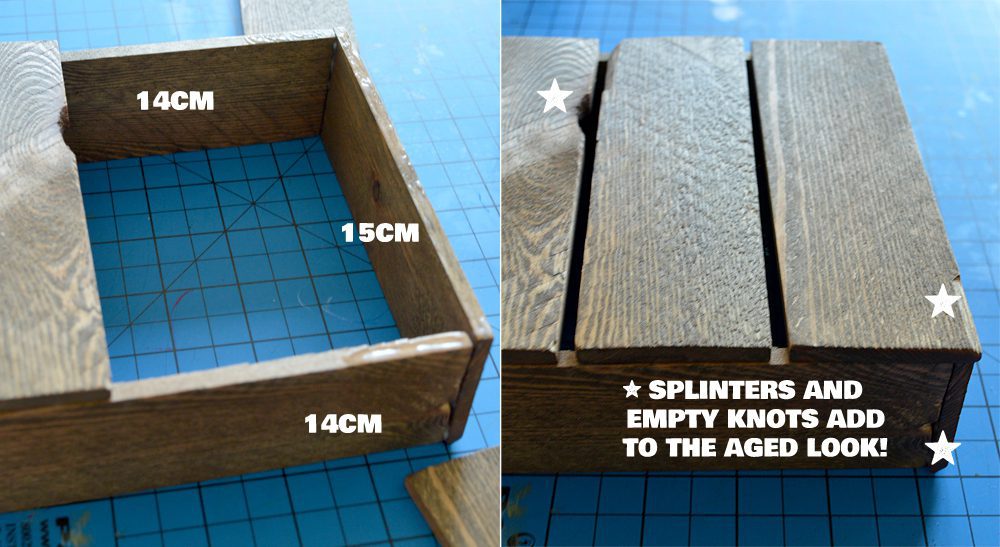
I used an old paintbrush to glue the crate together from the bottom up. The 15cm lengths were glued around the 14cm lengths as shown in the photo. Let the glue set the corners before putting on the base.
Glue on the base and let set for another 15+ minutes.
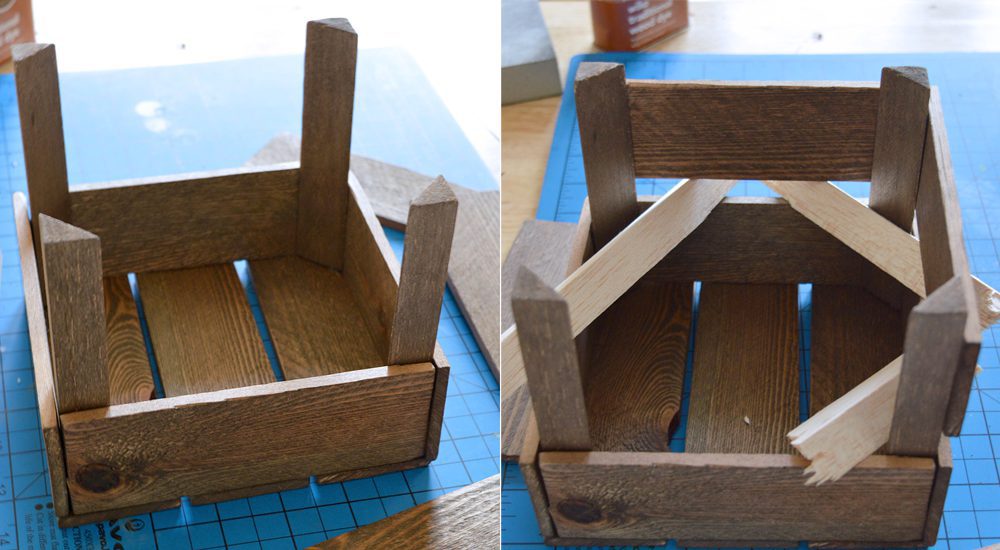
Once the bottom is set, turn it right side up and glue in the supports. Triangular supports mean you have more room in the crate. Squared lengths would would work too.
To add a gap, I used spare balsa wood to support the second level of panels. Use whatever gets the height you’re looking for! I attached the panels one side at a time and left the gap supports in for an hour until the entire crate was completely set.
All that’s left is to decorate, fill and style as you desire.
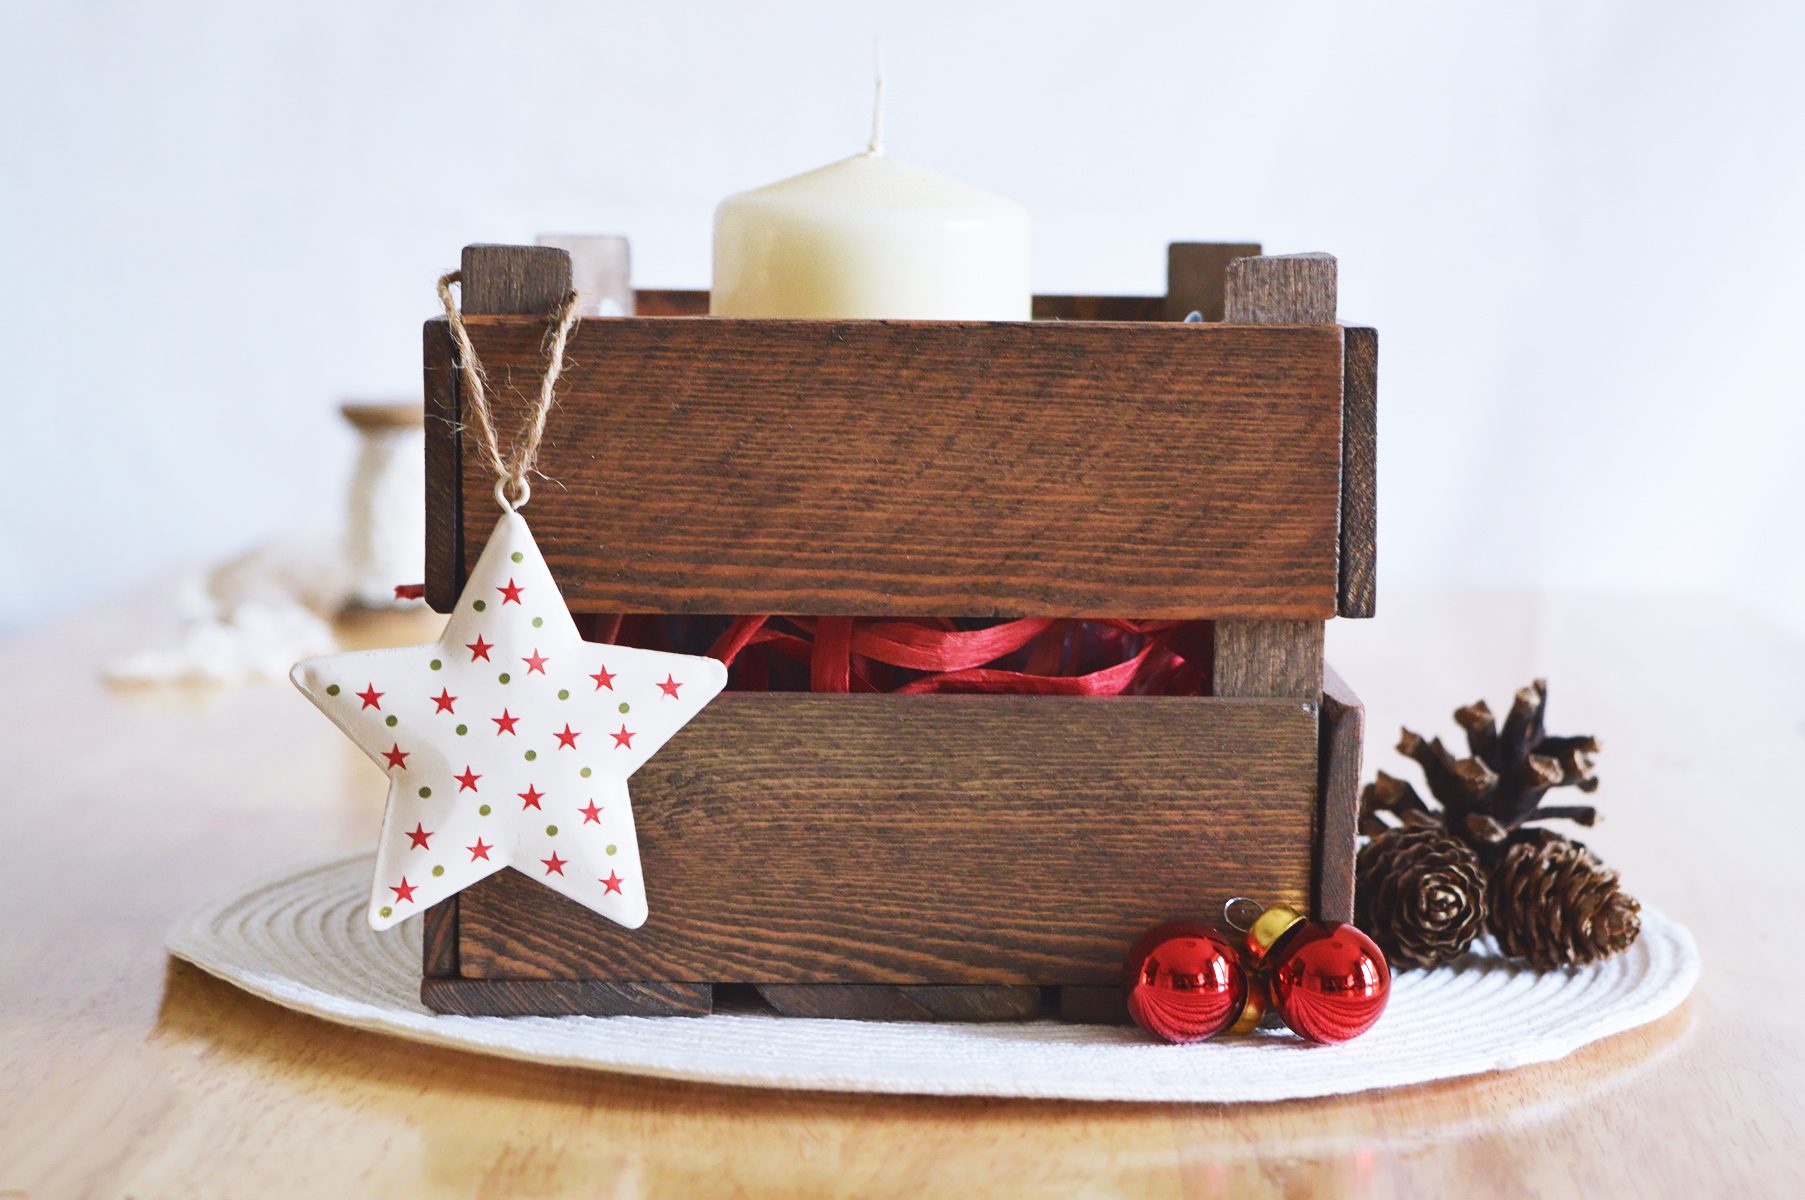
Voilà! Something cosy and cute all at once. This is a make I’ll be happy to display all year round.
What are you making for the holidays? I’d love to hear about it!
Lots of crafty love,
![]()
Get more crafty ideas and festive tips in the
Cotton Trader’s advent calendar


Love it! Good job making the crate, and decorating it too! Thanks for the inspiration … =)
[…] Anna made a cute rustic wooden crate. It’s adorable! The tutorial is on her blog Crafting Fingers. […]
[…] Let’s make a cozy rustic centerpiece for a warm, country feel, suitable for any case. You’ll need a farm crate as a base, so prepare a hobby saw and fine sanding block, wood dye in dark oak or similar dark brown-grey color, a hammer and nails or PVA glue and glue brush, a ruler and pencil. Use the ruler and pencil to mark the lengths you need. When sawing, don’t worry if the panel splinters at the ends. Once the pieces are ready, it’s time to age them. Subtly round the edges of the panels, but don’t sand the sides smooth. The texture will pick up more dye and add to the weathered look. Continue reading the tutorial here. […]
[…] 想更详细的了解阅读本教程 在这里 。 […]