DIY Sleeper Bench Makeover
Worn or weathered garden furniture doesn’t have to rot in the garage.
Repainting furniture is the easiest way to update the look. If you aren’t familiar with my Annie Sloan Chalk Paint obsession, prepare to be informed. Yet again chalk paint has worked its magic.
Here’s the 101: you don’t need to sand the entire surface, you don’t need primer, and it can be done in an afternoon. Seriously.
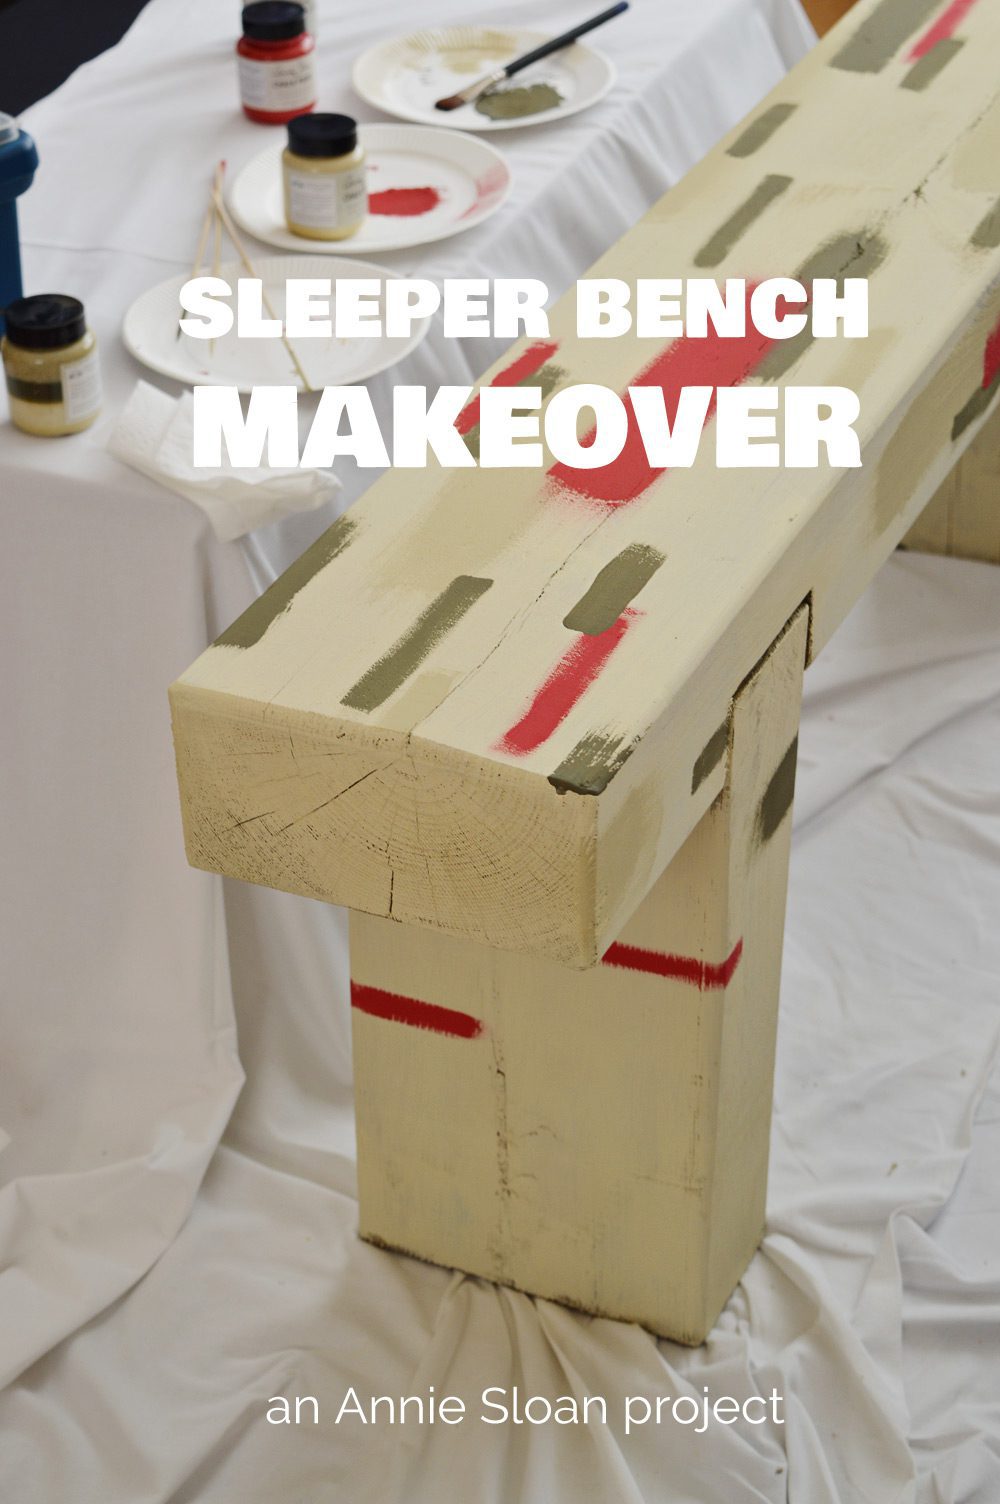
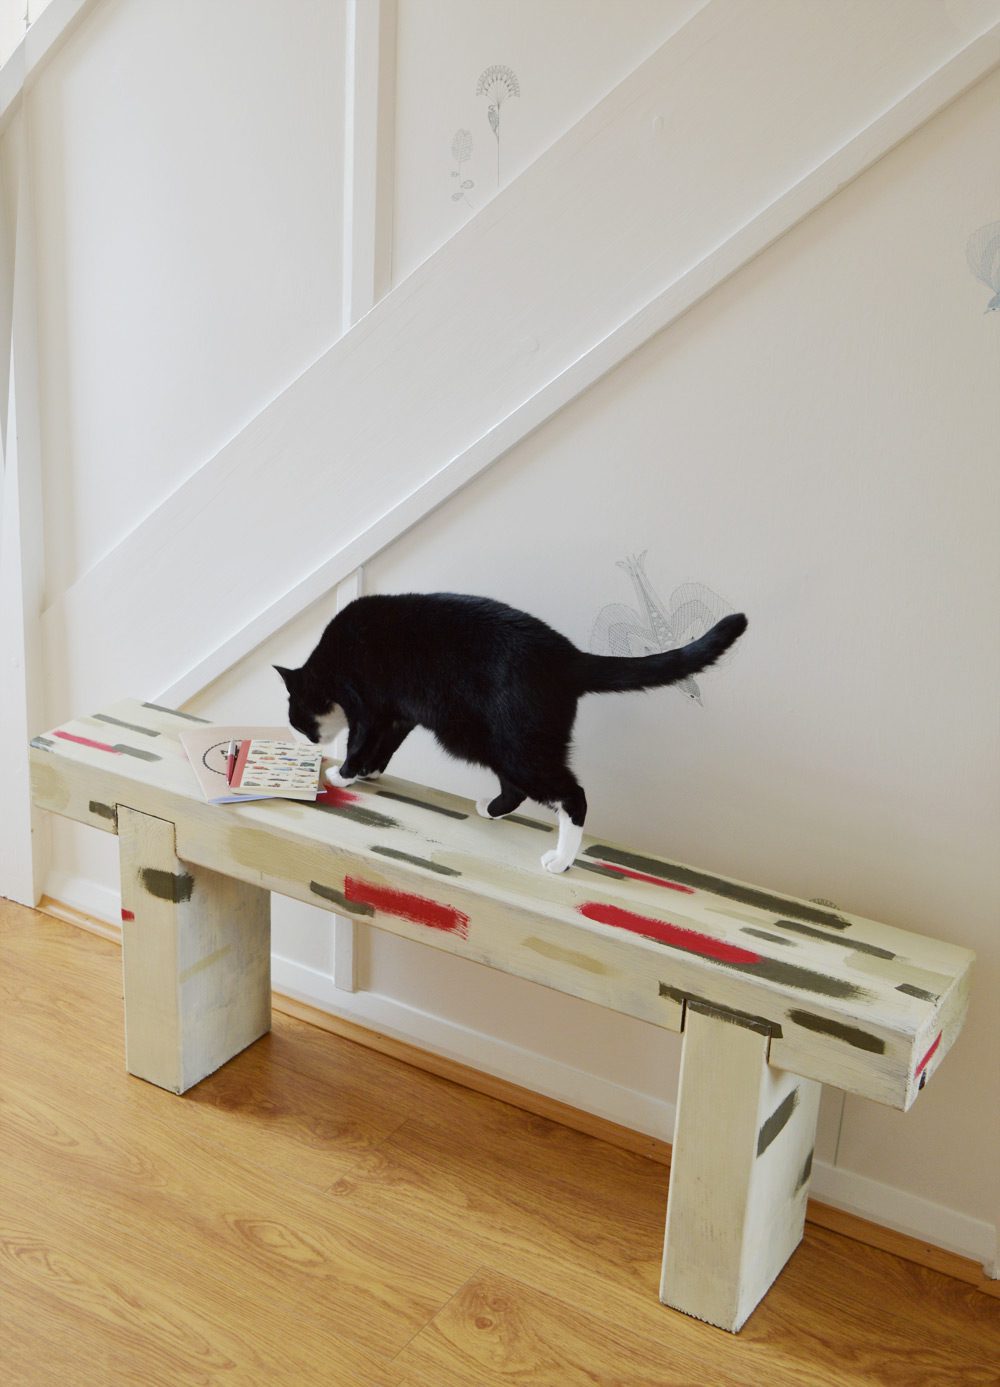
I love the solid, primitive look of sleeper benches. A brush stroke pattern was just the thing to make a simple shape a quirky part of the decor. If you want to use your bench outdoors, all you have to do is skip the waxing step.
This post was made in collaboration with MKM Building Supplies.
Materials
- Sleeper bench (I was sent one courtesy of MKM Building Supplies)
- Annie Sloan Chalk Paint; base in Cream, strokes in Versailles, Olive, Emperor’s Silk
- Paintbrushes in three sizes
- Annie Sloan Clear Wax & a lint free cloth
- Sandpaper
Putting it all together
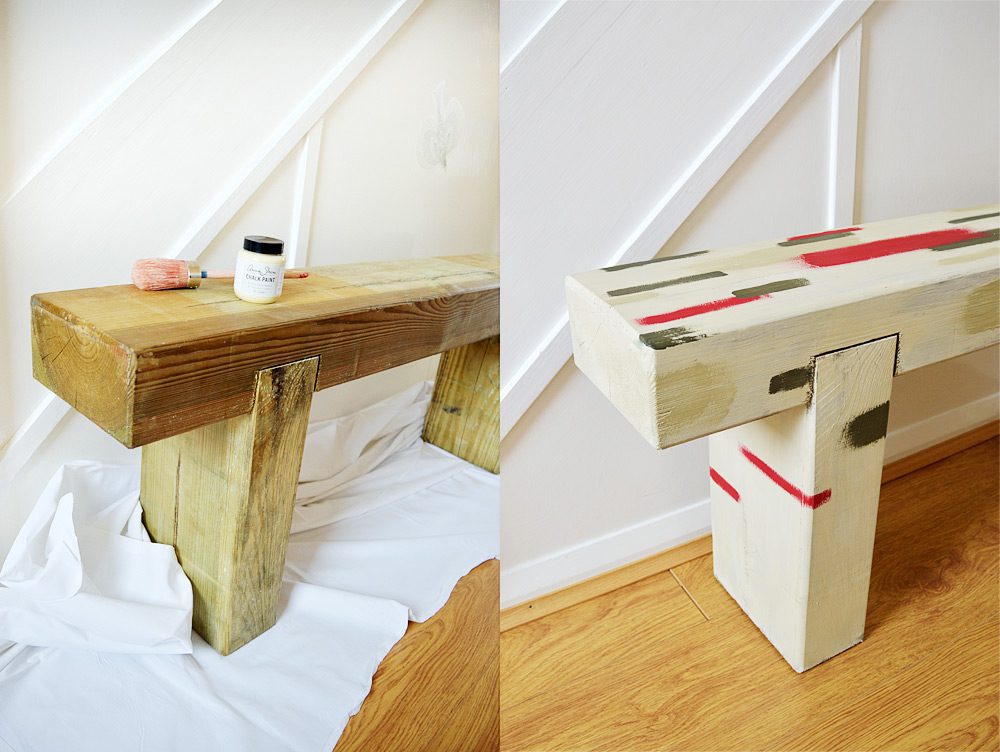
Here’s a quick before and after. The bench arrived on a rainy day, which meant the wood got a bit wet and needed some time to dry and fungicide treatment before it could be painted.
If your bench is in good shape, just sand down any splinters.
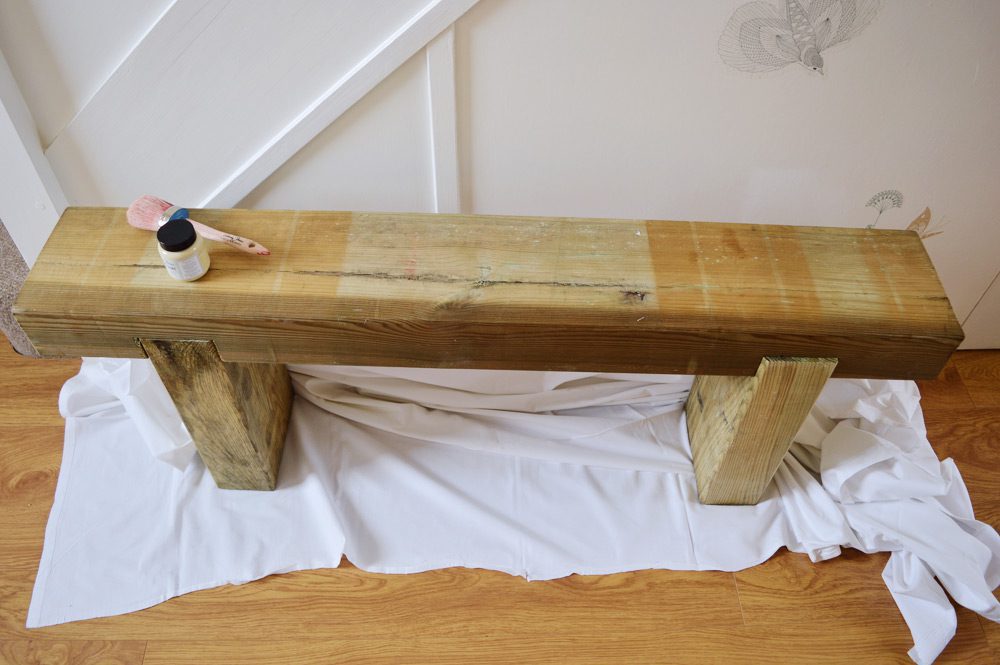
Another look from the top shows the bands of water exposure. Never fret, covering up any discolouration is simpler than you might think.
Just slap some paint on it!
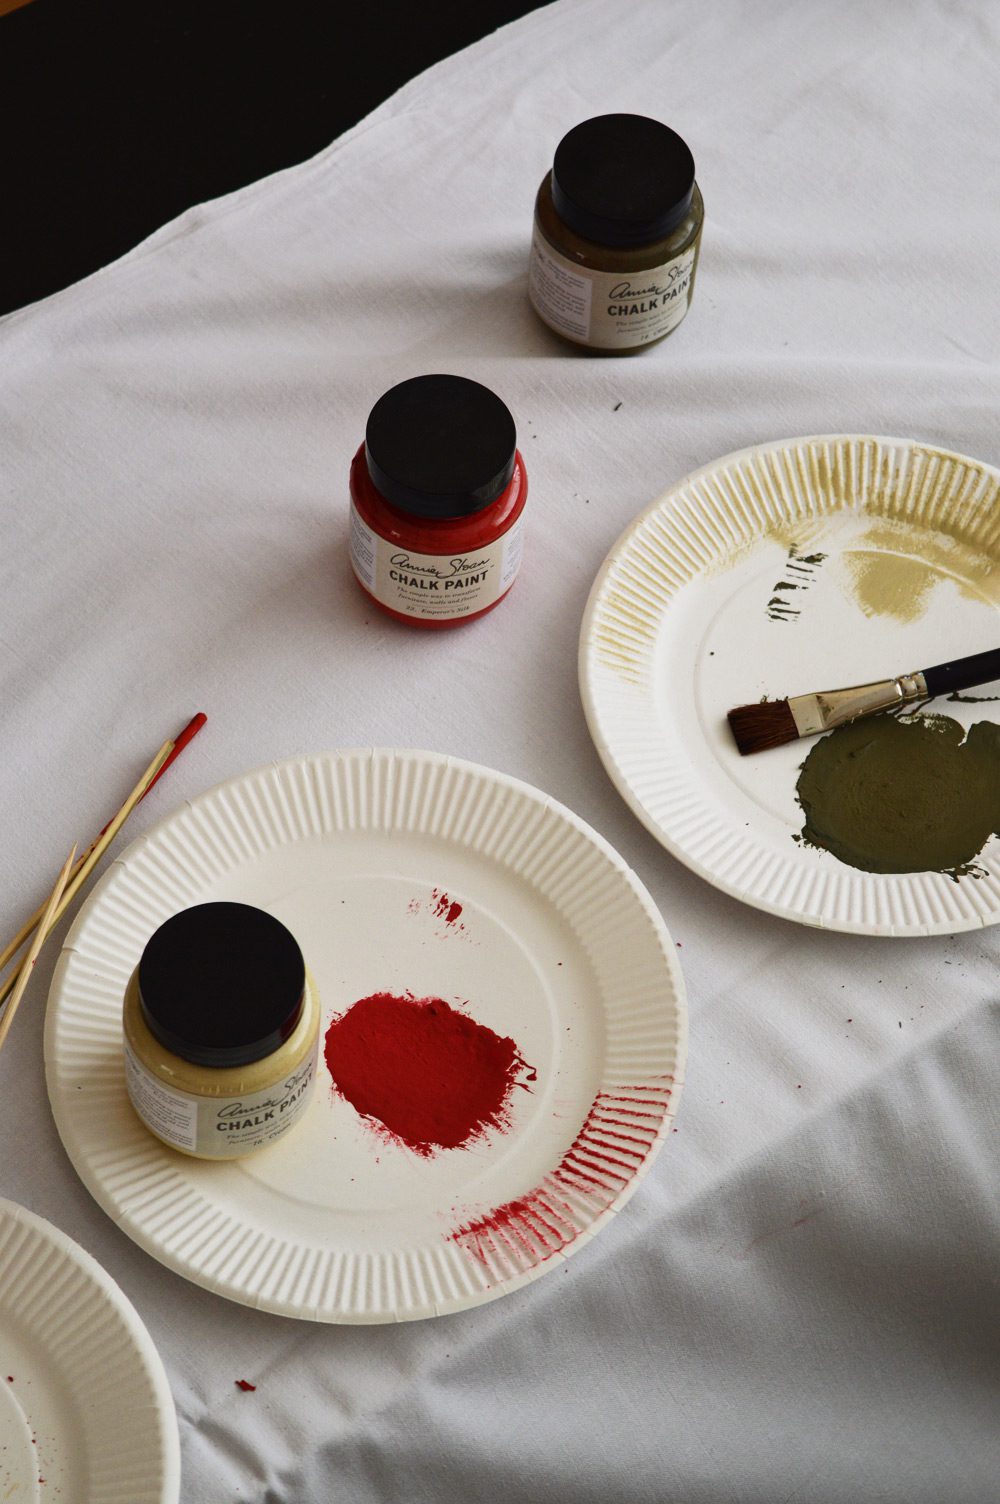
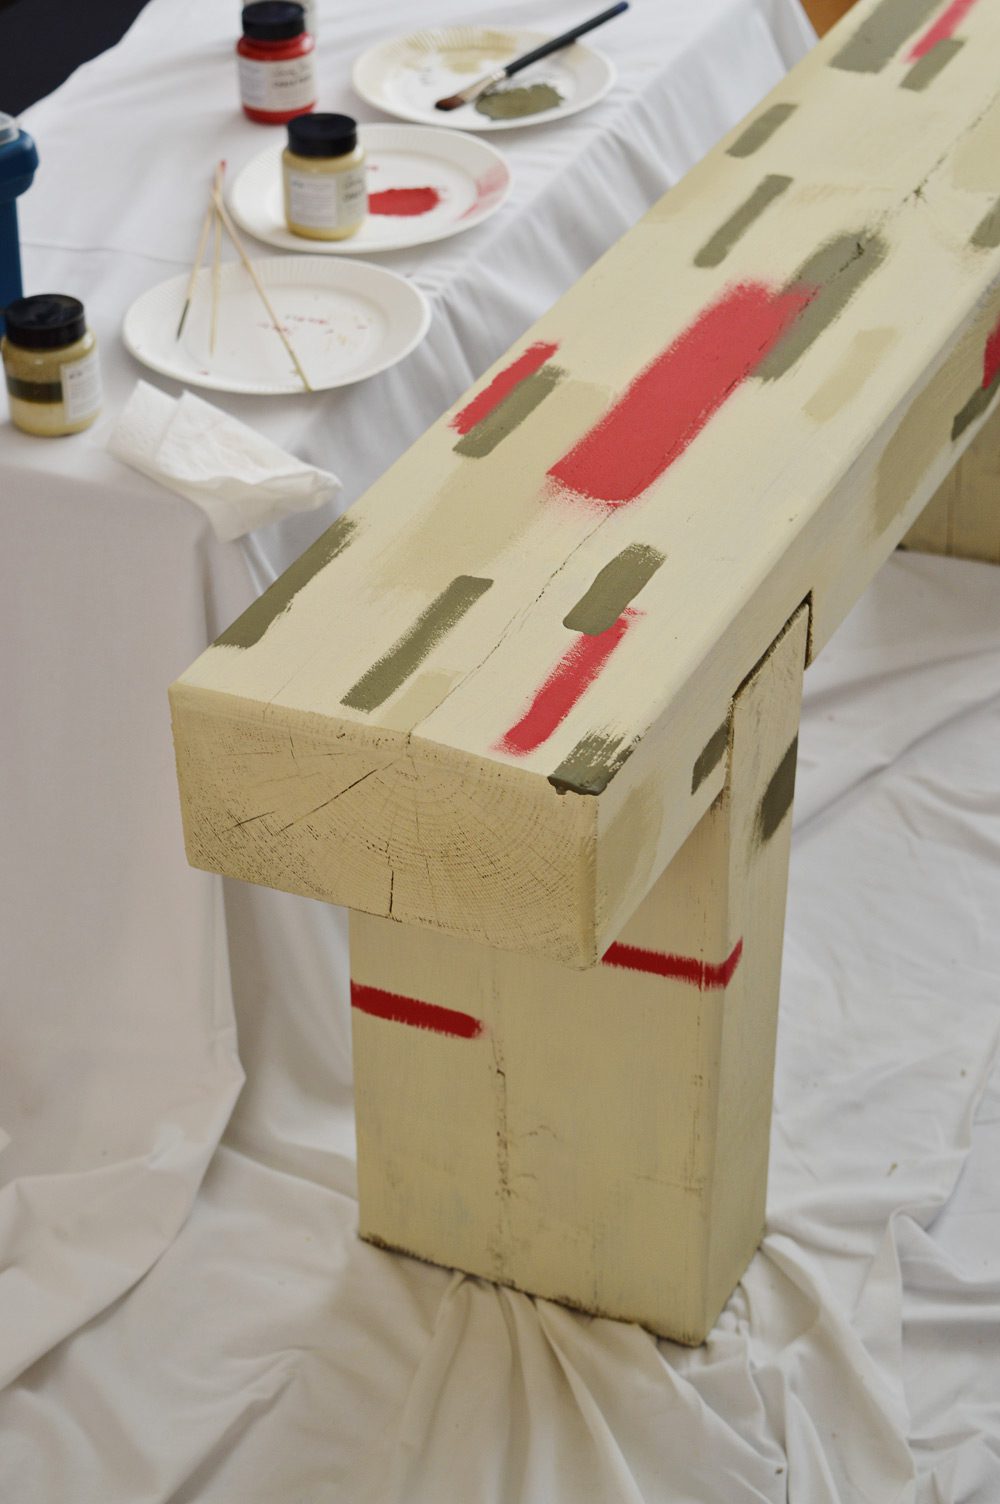
I set up a painting area in the living room with a thick sheet. If you’ve used Annie Sloan’s paint before, you’ll know just how technical it is: I used old food tubs to pour the paint, mixed the paint with a bit of water, and rested the brushes on some paper plates.
Chalk paint encourages you to use what you already have, so get hands on.
Annie Sloan Chalk Paint doesn’t need any primer. For the base I applied one watered down coat of Cream. I wanted a textured, slightly transparent effect. You can see some of the timber peeking through, especially on the edges. It’s a quick way to get a well-loved, lived-in look. I don’t like my furniture to look too precious!
And yup, those bands of exposure are gone.
I let the base dry for a couple hours before applying the brush strokes. I started with Versailles and Olive to establish the pattern, then let dry. The Emperor’s Silk was painted on last to add some interest.
I used Clear Wax to protect the bench. I might add some Dark Wax in the future to age the look. For now I’m happy with the timber peeking through the cream. If you want to use your bench in the garden, skip the wax and let the paint bake in the sun on a warm day.
Tips for a brush stroke effect
Random is a lot more deliberate than it looks. This was the first time I wanted to create a graphic, brush stroke pattern on a piece of furniture. Here are a few tips that made it easier:
- Think odds, not pairs. I used three stroke colours, with one accent colour.
- Again, odd numbers: I used three brush sizes for more variety.
- Keep some things consistent. The strokes went in the same direction, even on the base.
Turning a worn bench into pride of place of our hallway was such a satisfying project. There’s nothing like painting to brush away some stress.
(Pardon the pun.)
Lots of crafty love,
![]()


Love the brush stroke effect, not seen it before and it makes the finished object look so much more unique!
Thanks Zoe! I wanted something a bit funky and arty, brush strokes was just the thing.