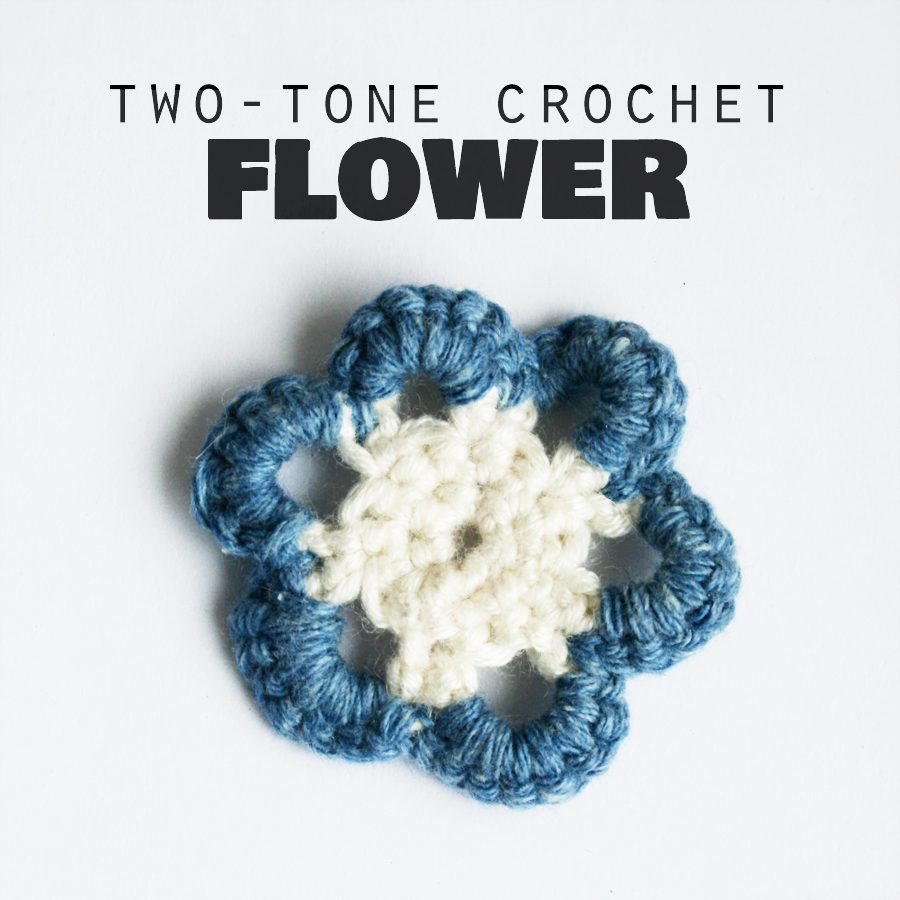
Two-Tone Crochet Flower
It’s time to celebrate! Every month in 2013 I’m learning a new craft, and now I’m halfway through.
In January, Crafting Fingers went live. After celebrating midnight on New Year’s I rushed home and published the first post on Crafting Fingers. How far this blog has come!
That month, I learned crochet. It was the first step on an amazing adventure so far, and I can’t wait to see where the next six months will take me.
This two-tone crochet flower is a quick project to crochet. Enjoy!
You need:
- DK yarn in white and blue (I’m using Sirdar Simply Recycled)
- 3mm crochet hook
- Yarn needle
The stitches used:
- Magic circle
- Double crochet (dc) American single crochet
- Slip stitch
And that’s it! Grab your hook and your yarn and let’s get started! If you need help, take a look at the photos after the pattern.

Two-Tone Crochet Flower Pattern
R1: Dc 6 into magic circle. Slip into first chain. (6 dc)
R2: Chain 1, dc into first chain space. Dc 2 into each remaining chain space. Slip into first chain. (12 dc)
R3: Chain 1, dc into first chain space, chain 5, dc into second chain space over. (Dc into same chain space, chain 5, dc into second chain space over.) Repeat 3 times until you have 3 chain spaces remaining. Dc into next chain, chain 5, dc into last chain space. Slip to first chain and cut yarn. Fasten end.
R4: Start second colour. Dc 7 into petal space, slip stitch in dc space of previous round. (Chain 1, dc 7 into petal space, slip stitch between dc of previous round.) Repeat to cover all petals. Wrap the tail around the white space between start and end of the round and fasten.
Confused? Check out the photos below to guide you through the rounds.
Photo Guide
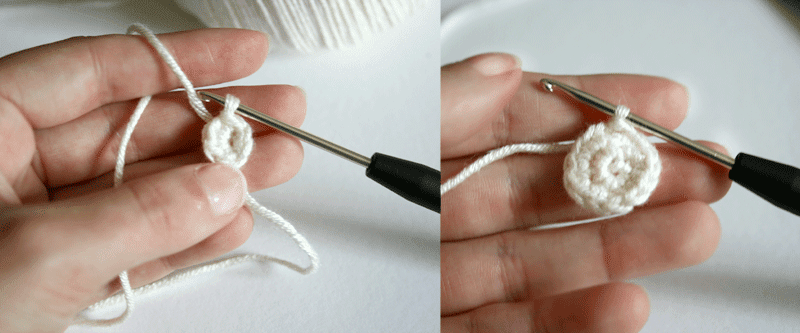
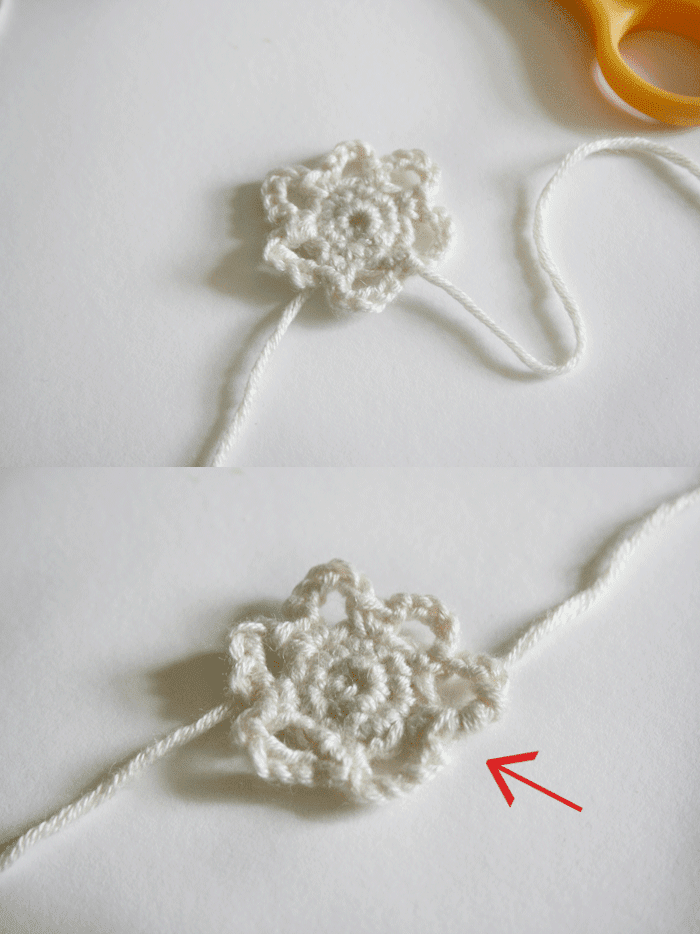
The completed first round / The completed second round
First round: Create your magic circle. Into it, dc 6 times, pull the magic circle tight, slip stitch into the first chain stitch. (Creates 6 dc.)
Second round: Chain one, then dc into the same stitch you slip stitched into. Dc twice into each remaining chain space. Slip stitch into the first chain to finish the round. (Creates 12 dc including first chain.)
Leave one chain space empty for each petal in round three.

The petals start and end in the same chain space.
Round three: Chain five, then dc into the second chain over. (See images above.) Dc into the same chain you ended the previous petal on, chain five, and dc into the second chain over. Repeat until you have three chain spaces left.
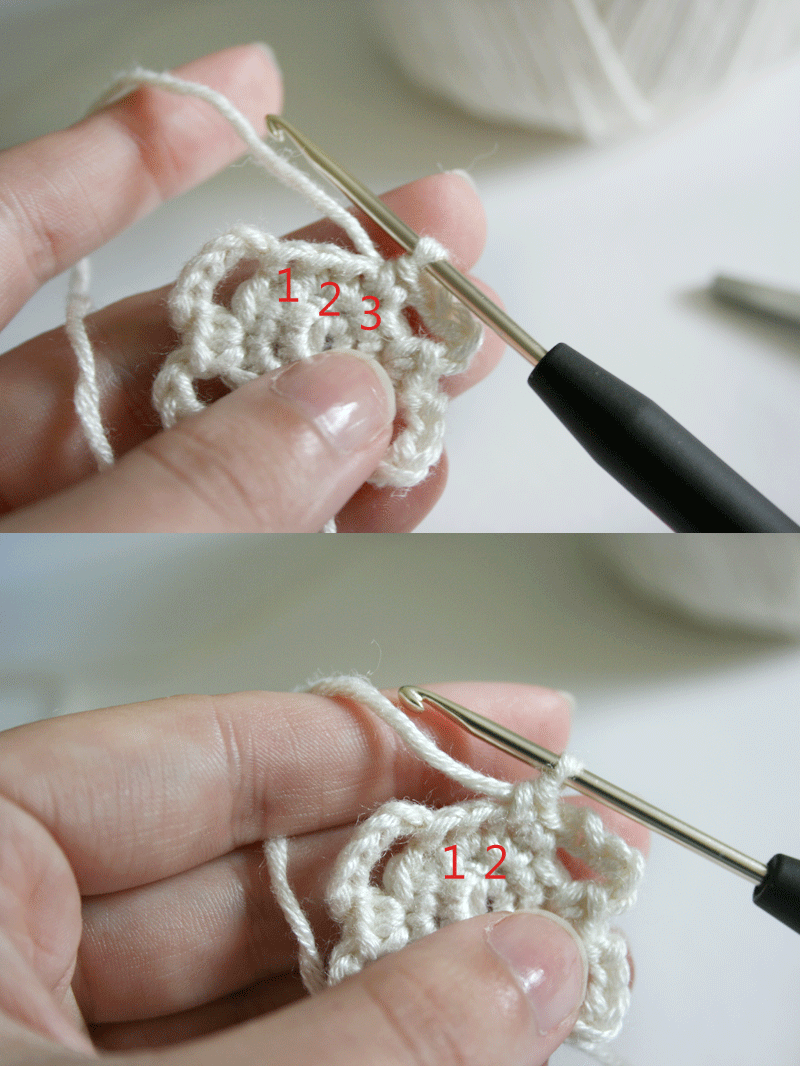
Finishing round three: Don’t start the last petal in the same chain space. Dc one chain space over (chain 3 in the photo above), chain 5, and dc into chain 1 in the photos. Slip stitch to the first chain to complete the round.
You can skip this step, but an easy way to fasten the end of the white yarn is to wrap it around the edges of a couple petals. The blue yarn will crochet over it and hold it in place.
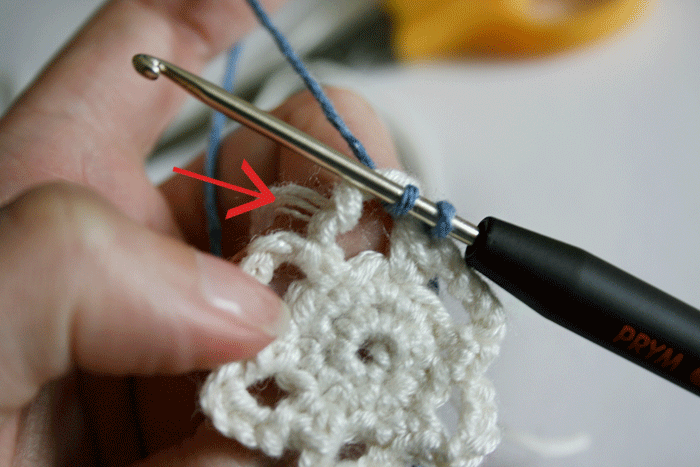
Start the blue yarn on the second petal you wrapped the white tail around. Make sure to push the blue yarn as far into the edge of the petal as possible.
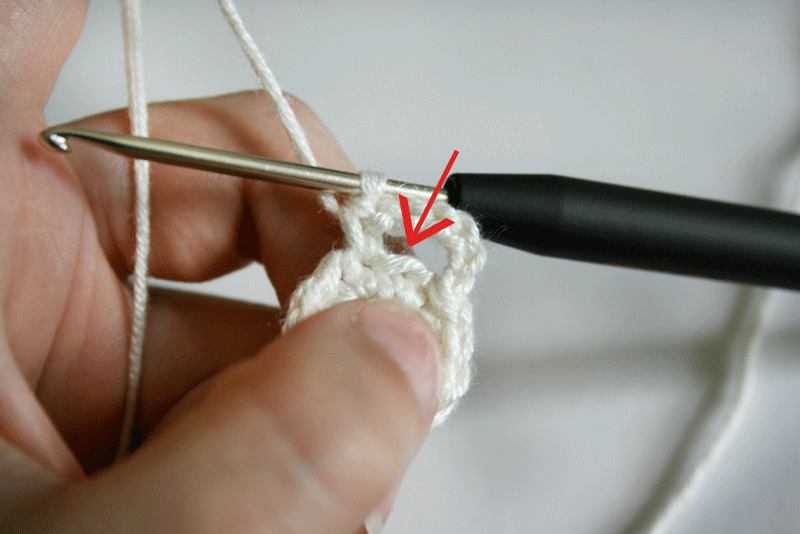
Round four: Start the yarn with a double crochet into the petal space. (Above photo.) Dc 6 more into the petal space. Slip stitch into the space between the dc’s of the previous round (red circle, below photo).
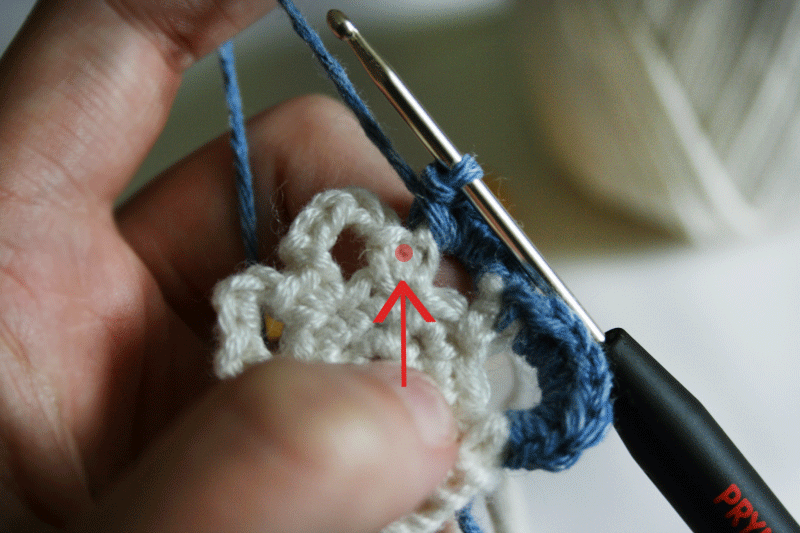
Continuing round four: Chain one, dc 7 into the petal space, slip stitch into dc space of previous round. Repeat for all the petals.
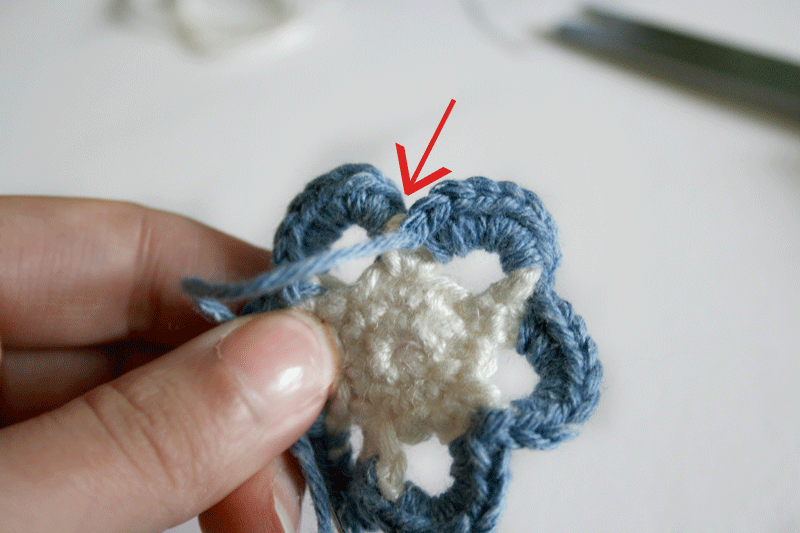
Leave a long tail for the blue yarn. When you have finished the last slip stitch and cut the yarn to pull it through, your flower will look a bit like this.
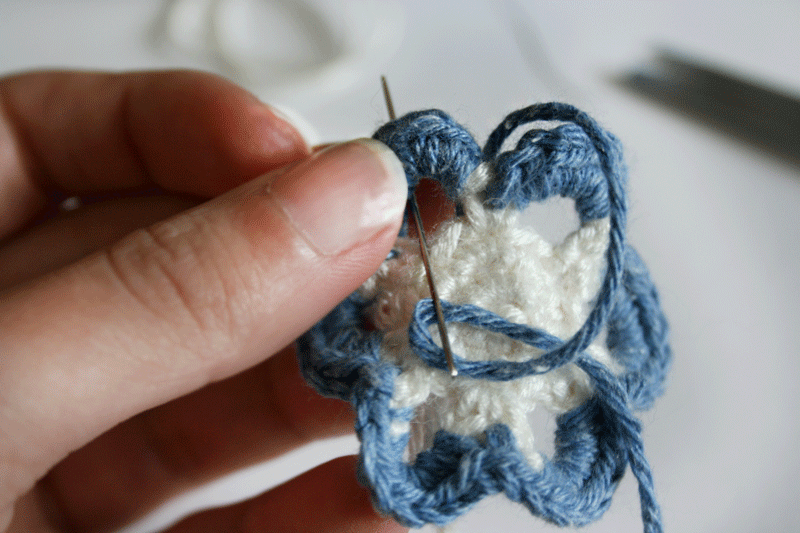
To make the blue yarn seamless around the flower, thread the yarn onto a yarn needle. First pull the yarn back through the same dc space you slip stitched into, then wrap the yarn once around the next petal. This covers the white gap.
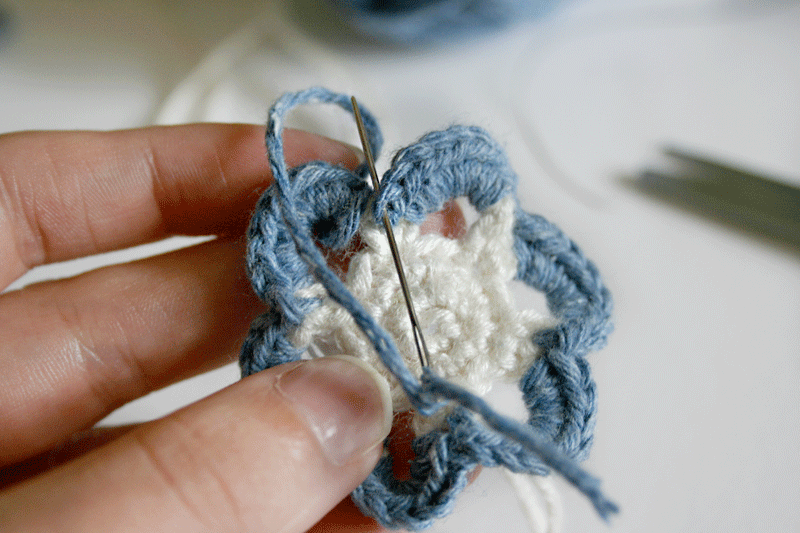
After wrapping the yarn around, thread the yarn through the last chain again and pull it through to the back.
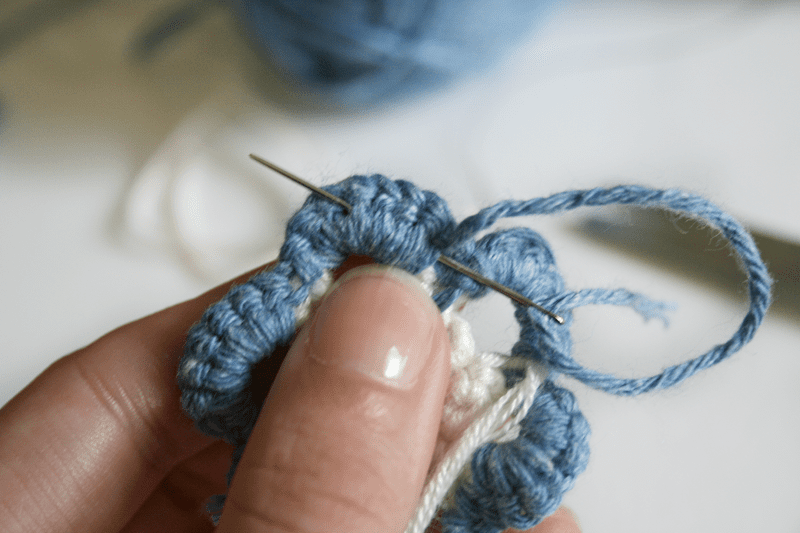
Pull the thread tightly, then thread the yarn through the back of the work like shown. Cut off the remaining blue tail. Cut off the white tail from the petal. Thread the centre white tail through the work with a needle, and trim.

Done!
I’m learning a new craft every month this year, and being half-way through means it’s time to celebrate! To say thank you to my readers I’m sharing one tutorial for each craft I’ve learnt in 2013. You all have done so much to spur me on.
Happy crafting!
![]()
Complete beginner at crochet? Click the bar below to show some videos that will guide you through the stitches you need for this flower. Once you get started, it’s easy!
[spoiler title=”Click here to expand the crochet video list”] [/spoiler]


What a lovely quick crochet project. I’m a big fan of the Simply Recycled Yarn.
Look forward to your remaining tutorials!
Thank you Claire! Glad to know someone else loves Simply Recycled too! It’s a great range, denim is probably my favourite colour.
[…] The pattern for her cute two-tone flower is here. […]
[…] going through my stashes I found some colorful granny bunting and crocheted flowers, both big and small, and a couple of other pieces that might fit the project. I’m mailing […]